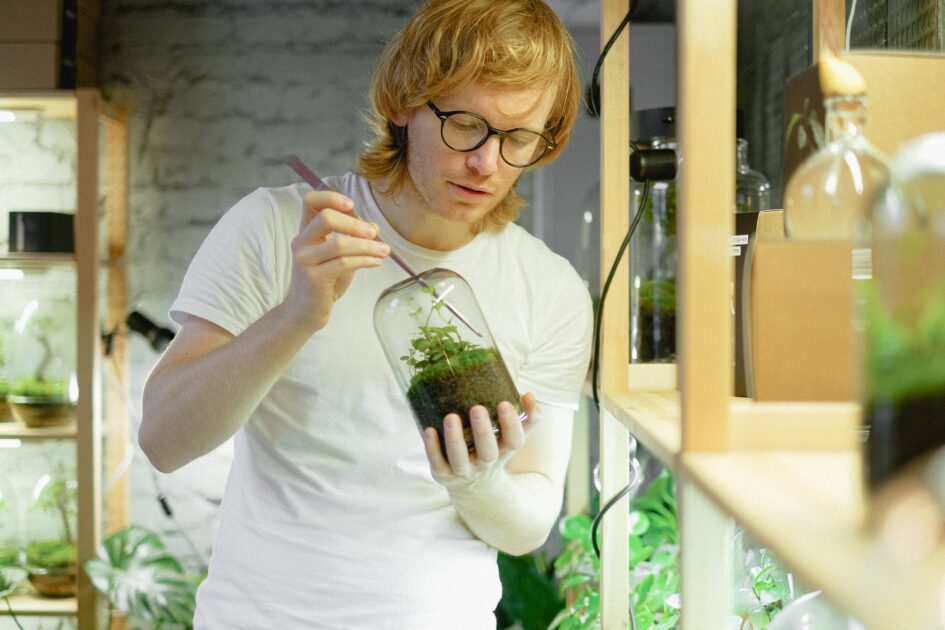
One of the fun but unpopular hobbies is to make a terrarium jar. A terrarium is a small and contained environment in which living organisms such as plants, animals, etc that live in an enclosed space.
Often, people who love planting or gardening but don’t have a lot of space can opt for it as a hobby. These jars are compact and require low maintenance making them perfect for first-time plant parents.
In this blog, we will understand the history of terrariums, and understand how they survive in such an environment, and you will also learn to build your own personal mini-terrarium.
History Of Terrarium Jars
In early 1820s, Dr Nathaniel Bagshaw Ward, a botanist accidentally had an idea that had led to the growth of terrarium in today’s time. Dr Ward was studying the behaviour of insects in glass containers, and that’s when he noticed a fern. This led him to investigate and later found that plants can thrive in a confined environment. It is done by recycling the moisture that is formed when the glass jar is closed.
These jars were first named “Wardian Cases” and were mostly used to transport and protect plants during long sea voyages. The sealed environment helped the plants to thrive even in the harsh sea climate.
Later, when interest in botany and exotic plants started to rise, many people would embrace their exotic plants in a terrarium jar. However, in the 20th century, interest started to decline.
In the 21st century, the interest reignited as they were seen as a creative way to bring greenery into homes. It soon gained popularity because people started to understand that these plants were easy to maintain and it also started to be recognised as an environmentally conscious hobby. Moreover, social media has also contributed to the boost in popularity of making terrarium jars.
How Do Terrarium Jar Survive?
Ideally, plants that grow in a moist environment are suitable terrarium plants. Since your plant is an enclosed space, the moisture in the jar is locked. This provides an ideal environment for the plants to grow.
There are 4 layers of a terrarium jar which are:
- Gravel
- Moss
- Soil
- Decorative Layer
The gravel drains all the excess water and works as a water drainage system in your jar. Whereas, the Moss helps to prevent any toxins or odour from growing, and the soil helps to provide nutrients to your plant. Lastly, the decorative layer consists of small decorative stones or sea shells.
Additionally, you can also add activated charcoal to absorb impurities as it helps to prevent any moulds, bacteria, or fungus in your jar.
What Are Different Kinds Of Terrarium?
Before you make your own terrarium jar, it is important to understand the two types of different terrariums:
- Native Terrarium
A native terrarium is made from simple supplies you find in your area. You can easily get your supplies from a nearby forest, a garden, or a park.
It is beneficial as it has a low cost. Nonetheless, there are high chances of finding insecticides and you will have less control over the kind of soil and plant you choose.
- Curated Terrarium
A curated jar will consist of store-bought materials, it will allow you to choose the kind of soil and plant you wish to grow. However, a downside could be the cost of a curated terrarium to a native terrarium as curated terrarium require more care and attention.
Also read: Baking As A Hobby: How To Get Started & What Are Its Benefits
How To Make Your Own Terrarium Jar?
As you are aware of what a terrarium jar is, its history, and the different types. Let’s take a look at how you can make your own glass terrarium.
1. Gather Things You Need
Once you have decided what kind of terrarium you want to make, ensure that you gather all the required materials such as:
- Glass Jar
- Pebbles
- Moss
- Mesh & Soil
- Activated charcoal
- Small plants
- Decorative items (optional)
(Note: if you do not have charcoal, you can buy store-bought ones in order to prevent toxins, or can make some on your own).
Once you have collected all necessary materials, ensure that you clean it well.
2. Add Pebbles
Add some pebbles into the glass jar. This is important as the pebbles will act as a drainage system that ensures water doesn’t pool at the bottom. They will work as your gravel.
3. Add Moss/ Charcoal
The third step is to add activated charcoal as it will help prevent toxins, and additionally help to filter out water and air. If you do not have access to charcoal, you can add moss.
4. Start Planting & Add Decoration
Carefully place the plant in the soil. Once done, you can choose to add some decorations such as coloured rocks. Decorating will help you to make your plant more eye-pleasing. However, it is optional.
Lastly, Ensure that you tightly close the lid to keep your plant well moist.
How Much Water Should You Add To Plants In A Terrarium Jar?
One of the most common questions while making a terrarium jar is how much water you need to give and how often. Since the plant is in an airtight container, there is a lot of moisture that is being recycled. Hence, it is important that you do not add a lot of water as it can kill the plant. Instead, you can spray some using a spray bottle.
Also read: 9 New Hobbies For Youngsters & DIY Projects: Easy And Fun Things To Make At Home
